Partii Trick - A Wii and a Printer for mindless entertainment
Creating a 3D version of my flat, connected to a printer to print virtual paintings in the real world. All on the Wii.
16th July 2025
Recently, I hosted a party at my flat. Now at our parties, we like to be a bit bizarre - with weird photoshopped decorations, bad accents and terrible games. Parties here have included some incredible games, such as “Power Play: Judging by the change in wattage shown on the Smart Meter, what appliance am I turning on?”, “What is Peter holding?”, and “The Printer Game: Who can send a picture of themselves to the wireless printer first?”.
For our most recent party, I decided that nothing says game like video game. Unfortunate, as that makes things more difficult that simply hosting a game of “Soviet Parliament”. Not heard of it? It’s where I give a speech, and audience members are arbitrarily sent out of the room for not being enthusiastic enough, until one winner remains. Anyway, having recently made the unwise purchase of an old CRT television I began to have an idea of exactly what to do: A game that allows one to escape reality by placing you very firmly in our flat, just virtually. On the Nintendo Wii. And involving the printer (yes, from Printer Game fame).
So, how to get started?
What follows is an in-depth technical exploration of this project.
Skip to the end to just see the result
Programming for the Wii
Programming for the Wii is surprisingly simple. Once you’ve hacked your Wii to run Homebrew (a term for custom unauthorised software), then you can write your own software using the devkitPPC library in C and C++. With this you can write programs that access hardware, access the network, write text to the screen, and draw simple graphics pretty trivially.
But we’ll need to do a bit better than that…
Another dimension
While a 2D version of my flat may have been fun, I came to the conclusion that my flat is not 2D in reality. So, I had to find out how to display 3D graphics on the Wii. Remembering that no good programmer writes code they do not have to, I went hunting for a library.
I decided to use the Wire3D library with its last significant update dating from 2014. An ideal library, as it comes with a Unity 3D exporter to export 3D environments from that software, to a format that can be loaded onto the Wii. Fantastic. The only problem? It would not export properly with any version of Unity created after 2014. So, it was time to get the Windows 7 PC out, transfer across a roughly contemporary version of Unity buried on their website, and activate it through a convoluted manual activation process with my Student License, which surprisingly worked.
Then it was time to create the models for the flat itself… which meant I had to learn how to do any sort of 3D modelling. After many hours failing in Blender, learning everything from scratch, starting over 4 times, wanting to hit my head against a wall not understanding why faces of the walls kept on disappearing - I eventually had a model.
I exported this to a .ftx file, transferred it from my Mac to the Windows 7 PC, and imported it into ancient Unity. Then I added lighting, a camera, and collision, exported again, and copied it back to the Mac - and finally, onto the Wii SD card. Done.
Sounds complicated enough, but I had to do this every single time I made a change, for example to fix something that was too complicated for the Wii, causing it to crash. This happened an awful lot.
Crashing and learning
Things do break… a lot, when programming something. You have to know what’s breaking to be able to fix it though.
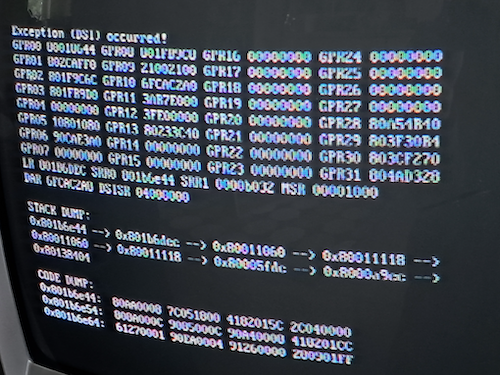
When Homebrew Wii software crashes though, we only get a good old-fashioned stack trace, consisting exclusively of memory addresses to read off the CRT. I’d never had to use one before, thanks to those modern debuggers which when running code on a PC print out what line of code is breaking. Not here. Here we had only the raw memory addresses on the stack, which I did not know how to use. Now I really knew I was at the low level.
Finding the mapping of a stack address to a line of code is what a modern debugger does anyway when it helpfully prints out a faulty line of code. So I could just use a modern debugger (gdb) on the executable and run info line *0x[ADDR] to figure out what line broke. Now I knew how to use an old-fashioned stack trace. A useful thing to learn working on a useless project.
Now I could fix things breaking, I decided we had to actually do something with the virtual flat.
The surprising difficulty of pressing buttons
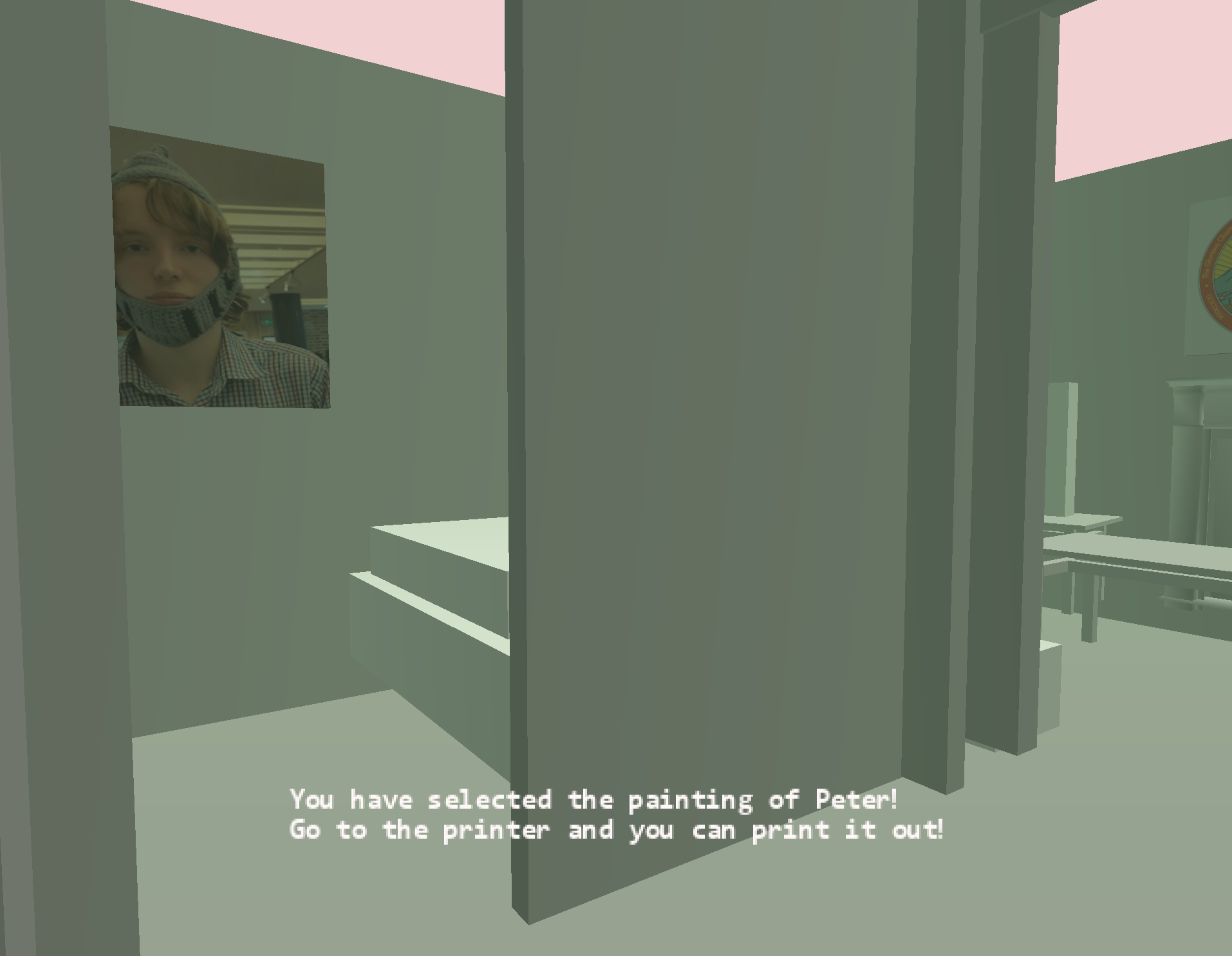
The aim was that people could walk around the virtual flat, select paintings from the wall, and print it out. The paintings were now on the virtual walls, but the program had to have a way of knowing what painting was selected.
Wire3D includes the Bullet physics engine. When a player presses a button, we could use this to cast a ray from the player camera to the object in front of them, and get the CollisionObjectController corresponding to the selected object.
But this is not a Wire3D object, this is a Bullet object. It does not have an associated object name. It does not have a pointer to a normal Wire3D object. A Wire3D object has a pointer to its associated Bullet object, but not vice versa.
But the CollisionObjectController does have a custom userPointer field we can set.
So, when the 3D models are loaded, we iterate through the object tree to find each named painting. For each named painting we get its corresponding CollisionObjectController and set its userPointer to its Wire3D object. We also map each of these user pointers to a hardcoded painting ID.
Then, when a user selects a painting, we get the user pointer, use the mapping to find the corresponding painting ID, and store this ID.
The program could now know what painting a player selects. Phew.
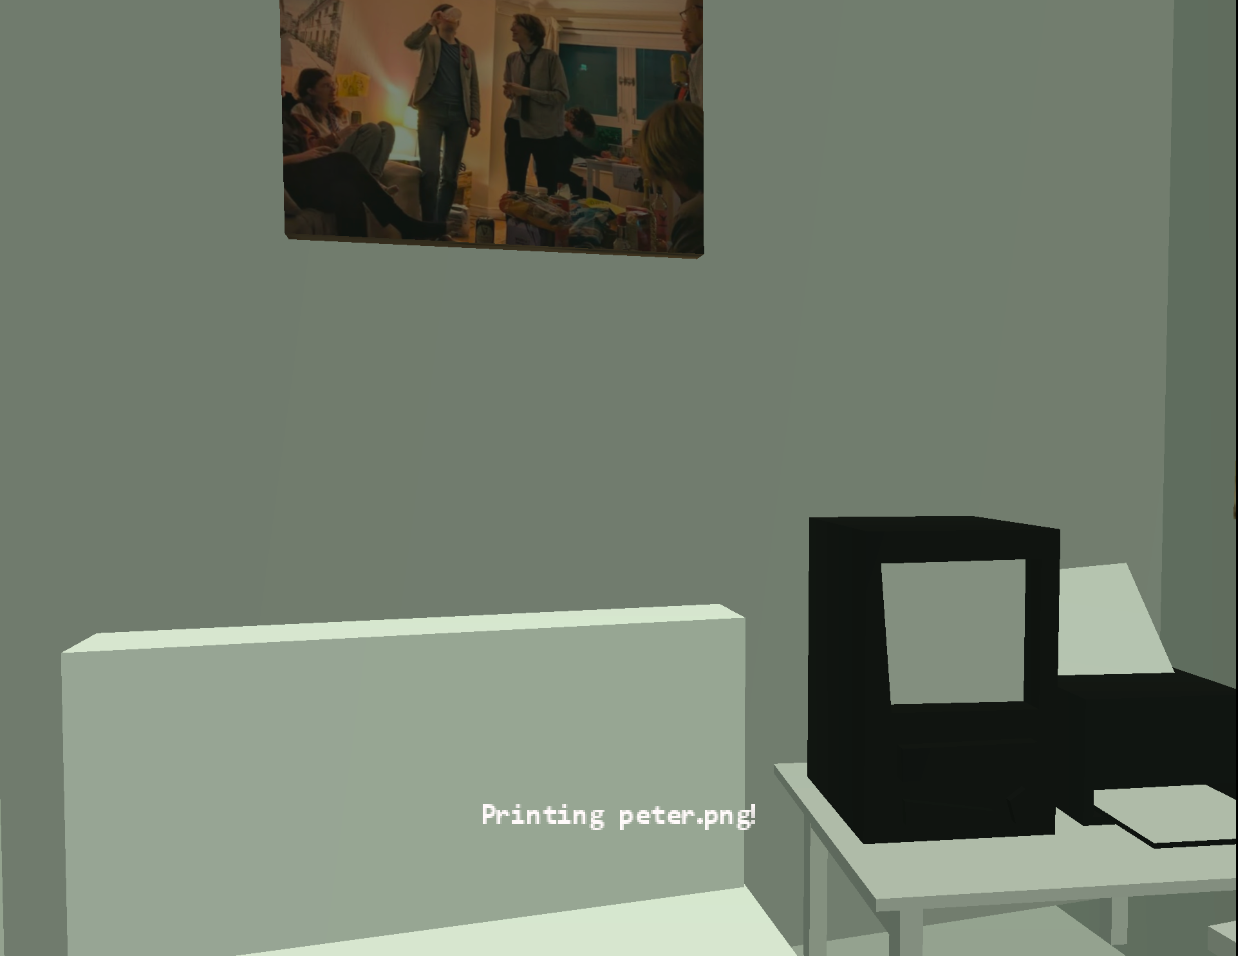
From Painting to Printing
Now, to actually print things out. One solution would be to write an entire printing stack that directly interfaces with the printer, but this would be far too complicated and involve writing driver and image conversion code - after all, I had tried something similar before without success.
So, time for a bit of a subterfuge. The Wii would send a command to a Raspberry Pi over the network, which would then print the corresponding image with its full Linux printing stack.
This was relatively simple. I had the Raspberry Pi run a Bash script which opens and reads commands from a TCP port, and had the Wii send a filename over for the Raspberry Pi to print.
The printing was actually the easiest bit of this project. It was, funnily enough, also the most impressive.
The Result
After 3 days, 2 computers, and (a surprisingly small) ~275 lines of my own code, I had the project completed.
And it worked! Every single time I tested it.
Apart from when it came to the actual party when the Wii through no fault of my own failed to connect to the WiFi.
Ah well.
I learned 3D modelling, low-level debugging, and a fair bit about 3D game development along the way.
I’d say it was worth it. It still looked cool.